The Basics of Adobe Audition Guide + Video Tutorial
Hey everyone, welcome to FilterGrade. Today we’re taking a look at Adobe Audition.
Audition is the audio recording and editing program included in the Adobe creative suite, and a popular choice for podcasts, video production, and more. In this blog and video, we’ll be starting with the absolute basics of Audition and how to get started with some common editing tools.
Watch the video tutorial:
I’ll be assuming you already have a microphone set up and plugged into your computer. To configure the microphone properly, open Audition and click on Edit, then Preferences, then Audio Hardware. If necessary, change your audio input and audio output to whatever microphone and speakers you’re using. Great, now all of your audio should be going to the right place.
Now all you need to do to record a basic recording is to hit the red record button! This first test recording will help you determine the optimal levels for your microphone. If you have an input volume dial on your mic, this is where to calibrate it. There will be a waveform showing your recording, as well as a green bar on the bottom. If that green bar goes into the red, then your input gain is too high and you should turn it down on your microphone. If it’s peaking up into the yellow, that’s fine. In general your voice should sit around the -12 to -6 db range to avoid being too loud or too quiet.
To stop the recording, click on the square stop button or hit the space bar on your keyboard. Now you have a recording! No matter how advanced you are, every new Audition project starts with a recording like this. What happens now is where things get interesting.
Now that you know how to record, we can get familiar with the default interface of Adobe Audition. In the top left, we have the Files panel, which will show all of your open audio files. So if you record something in Audition or drag in a file from elsewhere, that will show up here.
Below that is the Media Browser. If you’re familiar with Adobe Premiere Pro, this panel should be familiar. It lets you browse your disks to import files directly. It actually has a pretty good interface for finding audio files. While browsing, you can listen to files before importing them, simply by clicking once on them, as long as you have the Auto-Play button toggled on. This will make the process of finding the perfect sound for your project much easier, such as if you’re looking for the perfect sound effect in your library, for a podcast transition.

Also in this box is Effects Rack, which will make more sense once we start adding effects.
After that is Markers, which again if you’re familiar with Premiere Pro, will make a lot of sense. Markets let you take notes along the timeline of your audio recording, and those will show up here once you’ve made them.
Lastly for this box, the Properties tab shows project information such as sample rate and duration.
Moving down, there is the History panel, which will show a log of all of the edits you’ve made. The video panel will actually show you all of the videos you’ve imported. That’s pretty weird, right? That an audio software can import video? Well, much like how Photoshop is able to handle videos, so does Audition. This will let you work directly with the audio track of a video.
Over to the far right is the Essential Sound panel. In the multi-track view which we’ll look at later on, this panel will become very useful for adding effects to your project.
Finally, there are the main project elements, with the Editor and the Mixer in the center – the latter of which also only applies to multi-track editing. And then the Levels tab underneath, along with the Selection/View tab. The levels will show your audio volume levels in real-time, and the Selection/View tab will show the start, end point, and duration of whatever you are currently selecting and viewing.
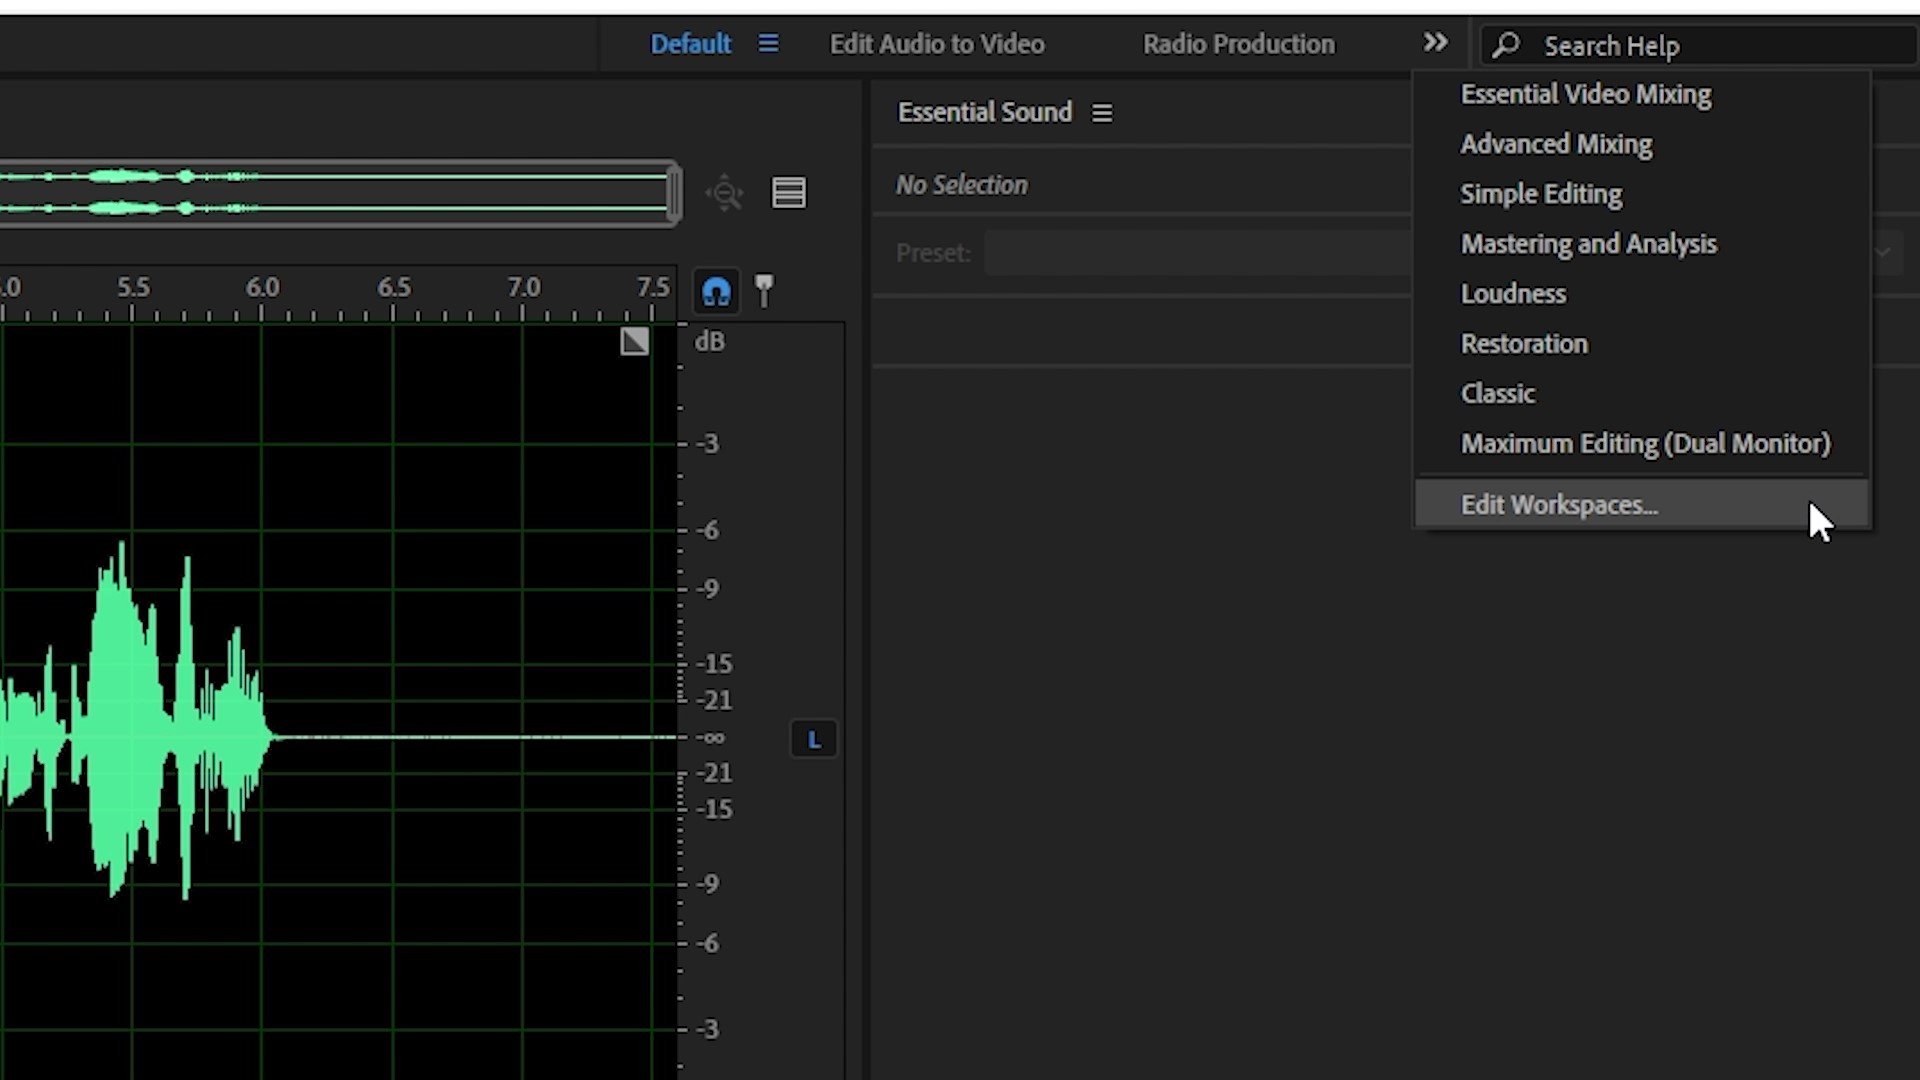
Up at the top right, we have a dropdown list of default workspaces. These are useful for various workflows, and feature options such as Radio Production, Advanced Mixing, and more.
To navigate the Editor screen, you can use the scroll bars, but you can also use the scroll wheel on your mouse to zoom in on wherever your cursor is pointing. You can hold the Shift key and scroll to pan left and right.
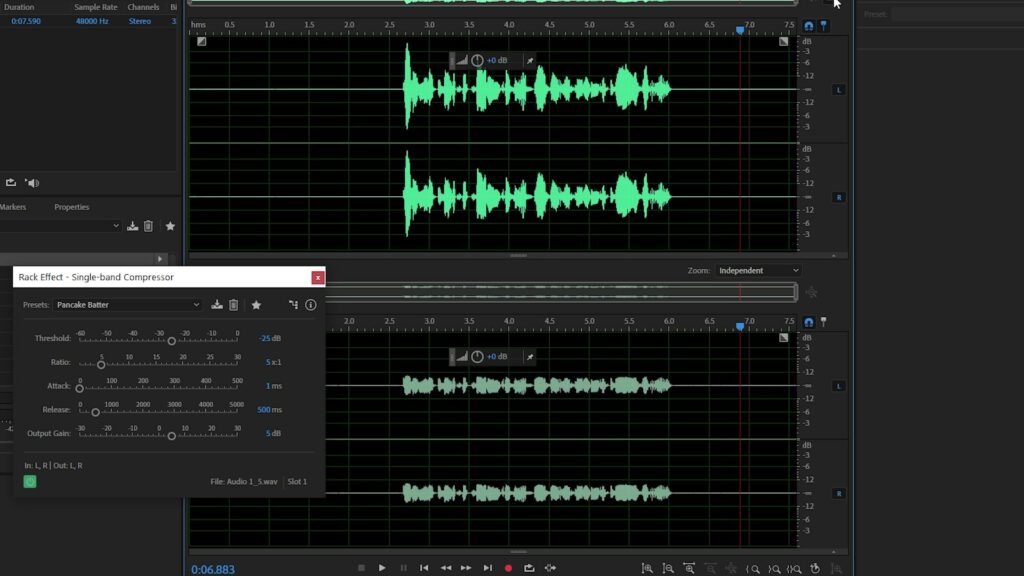
Now let’s add a few effects. Open up the Effects Rack panel. Click on the right-arrow on the first effect area, and you’ll see a menu with various options. You can also click on Effects on top of the screen, which will produce the same list. For now, let’s add some compression to our recording, with the Single-Band Compressor tool.
To show what adding an effect like this does, we can click over in the top-right of the Editor to show the Preview Editor. This will let us see a before and after of the audio waveform. To really see what this is doing, let’s pick the Pancake Batter preset. You can really see that this compression preset is cutting down the loud parts to match the quiet parts. Then, if we increase the Makeup Gain to be a more normal volume, we can actually see the waveform getting taller. This is a fantastic visualization of your audio, and a quick way to check if you’re peaking, or looking good to go.
Once you click the Apply button on the bottom, that effect is burned into the audio. Don’t worry, you can always go to your History tab and undo this action.
Now let’s check out the multi-track editing view. This, like the name suggests, lets you edit multiple audio tracks at once. This is perfect for something like a podcast with multiple speakers, music, and sound effects, or even a song with multiple instruments.
To open the multi-track view, go to the top left and click on Multitrack. Give the project a name, set the save location, and then you will likely be able to leave the other settings at their default values. Now you’ll have multiple audio tracks that will layer on top of each other. One of the differences between the Waveform and Multitrack editors is that Waveform editing is technically destructive, as we’re making permanent changes to the audio. With multitrack editing, we can easily toggle on and off effects on various tracks whenever we want to.
So, we can add a voice over track to track 1, followed by a backing music track to track 2. Now when you play your project, you’ll hear both playing at the same time.
To apply effects, you can use the Effects Rack just like before, whether those effects are audio enhancements like compression and EQ, or more specialized effects like reverb or chorus.
When you’re done with your project, you’ll need to export as an audio file. Click on File, Export, Multitrack Mixdown, Entire Session, then select your file type and save location. Most likely, you’ll want to choose to export a WAV file, as these are high quality. MP3 is also fine if you need a smaller file to upload online.
Here are some common audio editing tools you might want to use in Adobe Audition.
Firstly, if you want to edit only a specific part of an audio track, you can just highlight it to select it, then apply effects. However, to avoid confusion on larger products, you should just move this section to a different track with a different rack of effects. It’s easy to lose track of where your edits are if you’re just using the Waveform editor.
To adjust the volume of a specific part of an audio track, use the yellow line that runs across the waveform. You can click and drag to move the volume of the entire track up or down. You can also use keyframes to fade audio, or adjust specific parts of a track. To add a keyframe, just click on the line where you want a keyframe to be placed. You need at least two keyframes to make it work. If, for example, you want to lower the volume of one section, you would need 4 keyframes. For each side of this dip, you would need a keyframe at the point where the audio is at its normal volume, and then another keyframe at the point where the audio is at its low point. You can decide how dramatic of a change you want, by adjusting the angle of the line. A sharp decline will result in a sudden change in volume, whereas a long slope will result in a slow fading of the volume.
The blue line on the waveform is for panning left and right. It uses keyframes in the same way as the volume line, and as you move keyframes, you’ll be able to see what percentage of the audio is going to be on the left channel or right channel.
You can apply a quick fade in or fade out by dragging the grey squares in the top corners of the editor. This lets you precisely add a fade with a minimal amount of layered effects.
To delete a section in Waveform view, just select the area you want to delete and press the delete key. This will automatically fill in the space.
In addition to moving clips around along the timeline or across different tracks, you may also want to slice parts out of audio clips and rearrange them, or delete them entirely. To do this in the Multitrack view, you can select the razor tool from the top toolbar and make a slice at the desired editor point. Now you’ll be able to drag around each section independently or across tracks. You can also use this to delete sections. Use the razor tool at two points, use the select tool to highlight that section, then just press the delete key to get rid of it. Unlike in Waveform view, this will leave a gap rather than filling in the gap, which is essential for more complex edits like podcasts.
Hopefully now you have what you need to get started with Adobe Audition. There are plenty of effects to work with and each has their own interface. We didn’t touch on too many of them in this video, but you can check out our guide on the Essential Sound Panel in Premiere Pro to get a better feel for some audio effects that exist in both Premiere and Audition.
Let us know what you’d like to see from FilterGrade next, and don’t forget to like the video and subscribe to our channel so you don’t miss our future tutorials.


