How to Make Your Microphone Sound Professional in OBS

So, you’ve spent hundreds of dollars on a fancy microphone and you’re ready for your Twitch stream to sound absolutely incredible. And then the worst happens – your chat tells you that your microphone sucks. How could that be? You spent a ton of money on a microphone that your favorite streamers use, and they sound incredible. In today’s video, we’re going to talk about how you can use the built-in audio filters in OBS Studio or Streamlabs OBS to make your expensive microphone sound like it’s supposed to, and your low-end microphone sound like something much more expensive.

Audio is perhaps one of the most important aspects of a stream or video. Viewers can often excuse mediocre visuals, but an unpleasant auditory experience can completely turn someone off from a stream. Focus on dialing in your microphone first, then upgrade the rest of your setup!
Watch the full video here:
So, to access audio filters in OBS, click on the gear symbol next to the microphone you use for your voice, then click on Filters. You can add a new preset filter by clicking the Plus symbol. The order matters, as each filter will be applied in order. This does matter for some filters, which we’ll mention.
NOISE GATE
Whether it’s computer fan noise, appliances, traffic outdoors, or your children in the next room, a well-calibrated noise gate can remove these quiet but noticeable background annoyances.
Noise gates work by only turning on the microphone once it detects a certain decibel range. In an ideal streaming scenario, your talking voice will open the noise gate, but background noise will not.
Dialing in your noise gate may require some trial and error. By default, the noise gate will come with a Close Threshold of -32 db and an open threshold of -26 db. This means that the mic will mute any sounds quieter than -32 db and when the mic hits -26 db it will turn on the mic. To calibrate it better, you should sit completely silent in front of your mic, with average background noise. Computers on, housemates watching TV, anything that would typically come up in your recording. If any noise is being picked up by OBS, just move the close threshold closer to zero until there is no more background noise being picked up. Your microphone shouldn’t be picking up anything unless you’re talking! To set the open threshold, start talking and you should see that the sound bar is picking up your voice. Increase the open threshold until it doesn’t show any input, then bring it down slightly from there. You’ll want to experiment a bit with this by doing some practice recordings. You want a pretty tight threshold range, but it’s easy to have the quiet parts of your voice cut off. If you’re on the quiet side when it comes to speaking, your close threshold may cut off your voice if it’s too low.
Don’t be too concerned with the other settings. Attack time is the fade-in time when the mic goes from off to on. The hold time is how long the mic stays open after it has stopped detecting sound within the range. Release time is the fade-out time from on to off once the hold time is over. The stock settings should be fine here, but if you really want to dive into these settings, the option is there.
COMPRESSOR
A compressor is one of the most powerful audio tools out there, that can really make your microphone sound amazing. To put it simply, compression will raise the volume of your audio’s quiet parts, and lower the volume of the loud parts, resulting in a much more consistent audio signal. Technically, it only lowers the volume on the loudest parts, and then adds makeup gain back to the audio so that the whole thing is a normal volume. This works wonders on voices and can create a much more pleasant listening experience.
The default settings in OBS are a good starting point, but the 10 to 1 ratio is a bit extreme. What this means is that for every 10 db the audio source is above the stated threshold, it will actually only be 1 db louder. Therefore, the higher the first number, the more aggressive the compression. For your voice microphone, 6 to 1 is a more appropriate ratio, but you can find your perfect ratio through testing.
The threshold is the decibel level at which the compressor will kick in. Something between -20 and -10 db should do the trick.
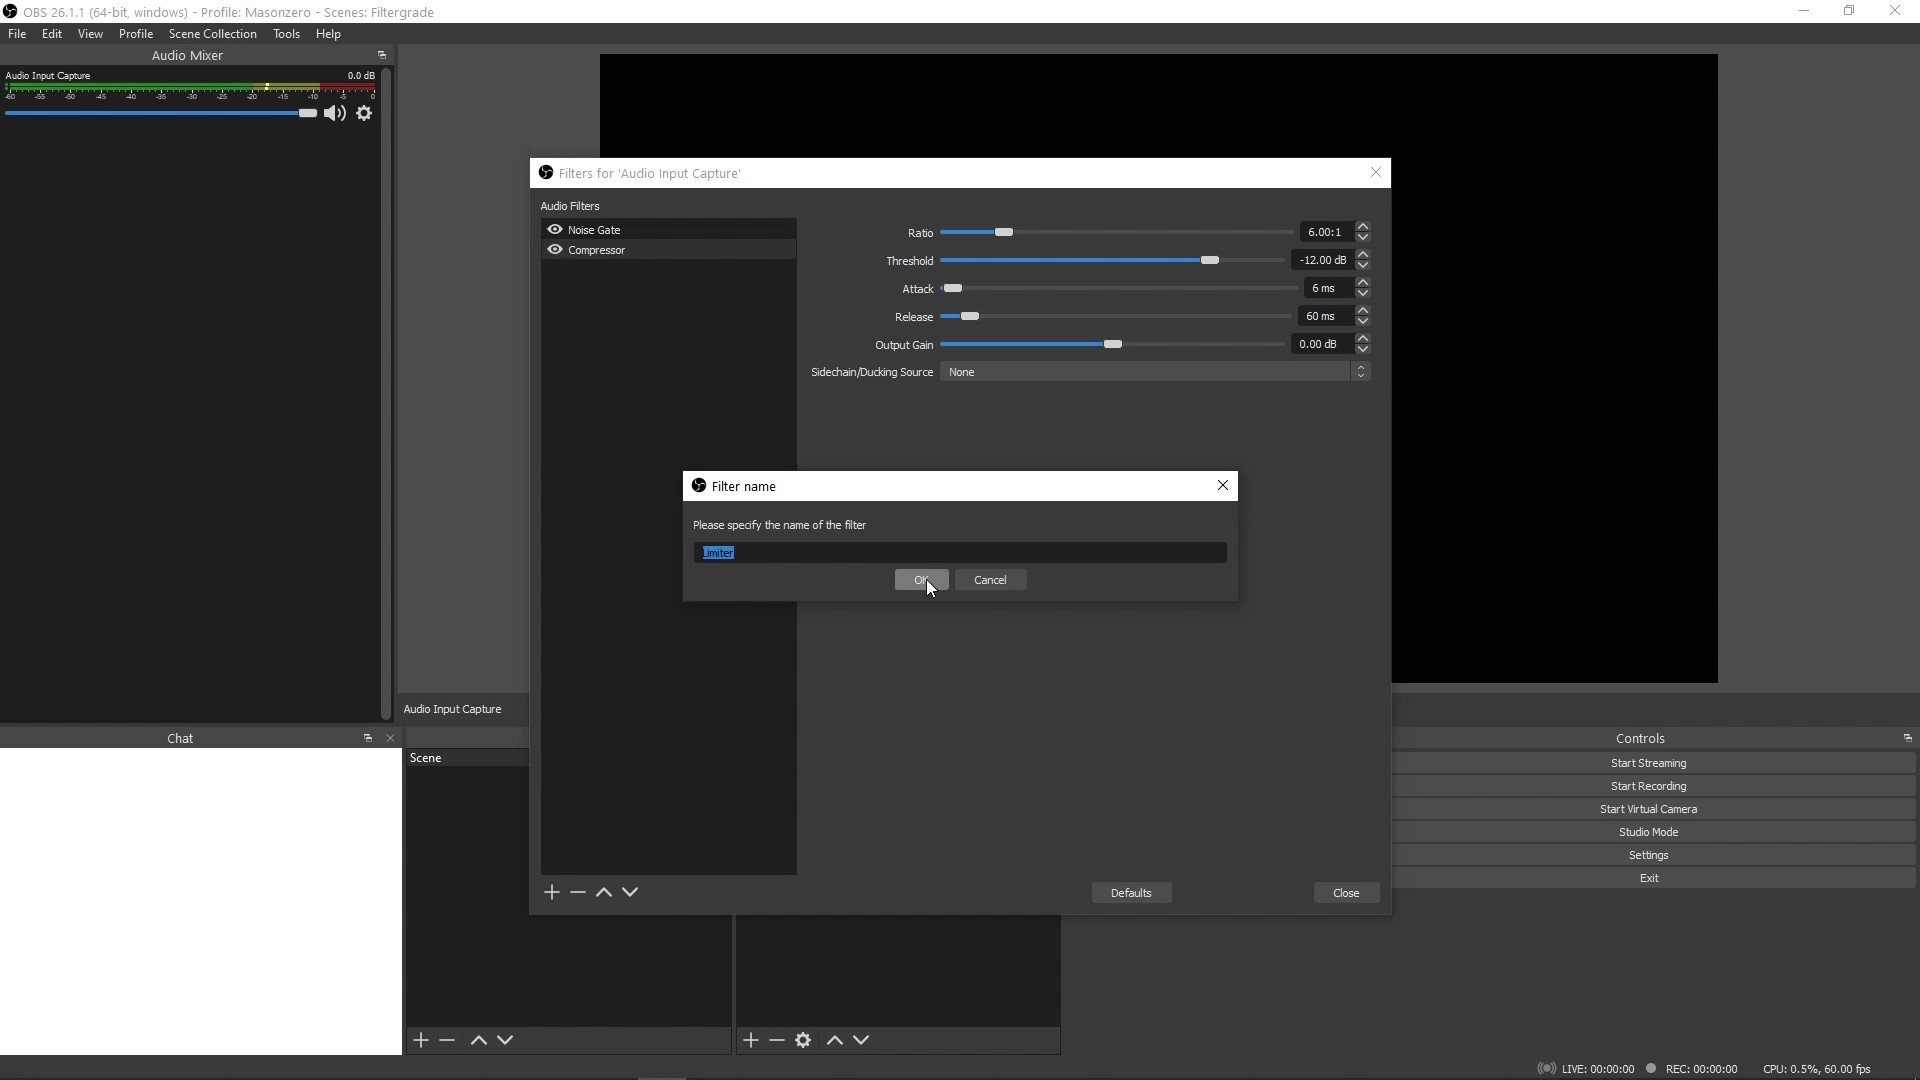
LIMITER
A limiter is exactly what it sounds like. It limits the audio to a certain value, and cuts off everything above that. If you ever notice clipping or peaking on your microphone when you speak loudly, this can help prevent that. Setting the limiter to 0 db is a good start, and will prevent your audio signal from becoming distorted, Depending on the microphone’s reaction to loud noises, you may need to set a lower limit. Again, experiment with this to see how strong of a limiter is necessary, if at all. If you do use one, make sure it’s the final step in your audio filter chain.
Finally, here is my sample audio with no filters, with noise gate and compressor, and with all three effects.
Following these tips, you can make your microphone sound better than it does out of the box. These simple filters will completely change how you stream, and the quality of your stream. If you want more streaming, audio, or video tips, make sure to subscribe to FilterGrade so you can see our new content and tutorials as soon as they come out. See you in the next one!


Good News. Waves released plugins support for OBS (PC only) via their StudioRack plugin. You can check it here: https://www.waves.com/maximize-audio-quality-streaming-in-obs-studio
Awesome, thanks for sharing Ittai!