How to Create and Sell your Own Photo Book

So you have tons of photos that you are proud of and you’d like to do more than just showcase them online – how about make a photobook? Some call them coffee table books, some call them zines. Whatever you want to call them, there is something great about holding a book of your creative work in your hands.
Back in the early days of photography all photos were tangible things your could touch and interact with. Now they are nothing more than pixels on a screen. A photobook can be a great way to get clients, show off your photos to friends, and in some cases make some extra money. There are a lot of ways to get your photo books made. Depending on your goals and needs, some ways may be better than others.
THINGS TO CONSIDER WHEN MAKING YOUR PHOTO BOOK
- You’ll need to figure out what image you want for a cover.
- You need a title for your book.
- You need an ISBN # if you plan to sell but most sites offer that free.
- You need enough images to fill a book. The number of images will vary depending on how you’ll lay it out.
- Decide your end goal. Is this a personal book for you or do you plan to sell it?
- Hard cover or paper back cover? This will affect where you publish at and the cost.
- Color or print and size effects cost as well.
- Do you have images that are the correct resolution? All need to be at least 300 dpi
- Don’t publish images you don’t have the rights to publish. It’s a good practice to make sure you have written permission to use the subjects in your image as well.
- Research what site you want to create your book through and find out the sizes that have available for books.
For those looking to add a unique touch to their projects, exploring creative photo book designs can provide inspiration and a wealth of customizable options tailored to every narrative.
BLURB

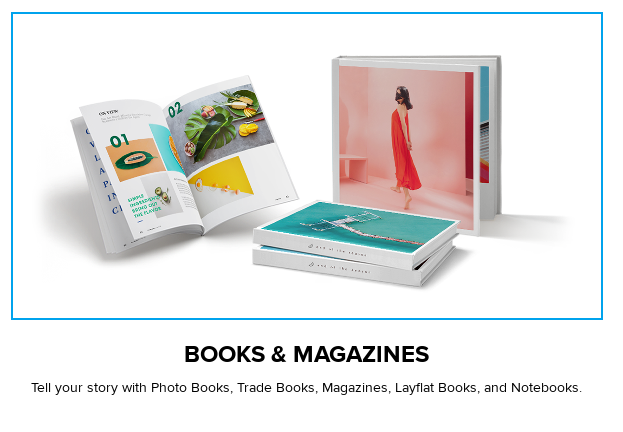
With Blurb you can create photobooks, tradebooks, magazines, ebooks and traditional books. The cost of creating a book with be dependent on your book choice, page count, paper type, cover type, and book size. You have the option to print out book for personal use, sell in the Blurb Bookstore or integrate and sell on Amazon.
If you already have your book and layout designed then it’s a simple as exporting your design as a PDF. To make sure your have the right settings for blurb, check this out.
If you don’t have your design yet you can use Blurb’s Book publishing software, Bookwright.
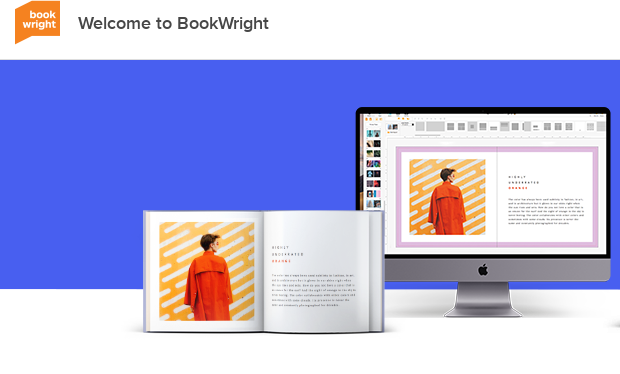
Bookwright is easy to use. You’ll need to download and install the software from their site to use. Once installed you’ll open the software and hit the create button to get started. Once you do this it will ask you what you ‘d like to create. First select books & magazines, then select photobooks. Once you do this you’ll be given options for the book size. You’ll select next and be given more questions.
Next the software will want to know paper type and cover type. Each option will change the price and you’ll see that reflected on the screen. Once you select this you’ll name the project and find a place to save it on your computer.
You’ll then be given options to add a layout, add pictures and even add text. The interface is very easy to use. You’ll have an option for selecting your cover image as well. Once your are done getting the layout the way you want it you’ll hit the upload button and send it to Blurb for printing or selling depending on your needs.
AMAZON KDP
If your goal is to sell your book the best possible option may be using Amazon Kindle Direct Publishing. The first thing you should know about Amazon KDP publishing is that they First, you’ll need to set up an account with Amazon KDP. You’ll need to create a username and enter your tax info for book sales. And a bank to pay payments to. Once you create your login for Amazon KDP you can log in to upload your book at the bookshelf. You can upload a PDF into the bookshelf so you’re final product should be a PDF.
To create your book you should use something like Adobe InDesign, or PowerPoint. I know it seems odd to use PowerPoint, but if you aren’t comfortable with Adobe InDesign then PowerPoint’s drag and drop approach to placing images makes it real easy to use for creating books. Here is a video tutorial on how to do it.
Before you start creating your book determine which size book you want to create. You can check for book sizes here. A quick note on Amazon books – there are no hardback cover options for Amazon KDP. So anything you create through Amazon will be a paper matter or glossy cover only. Once you create your book in either a design software of PowerPoint you’ll need to export into a PDF.
Now that you have your final PDF you should log into Amazon KDP here.
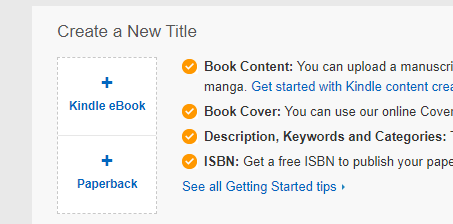
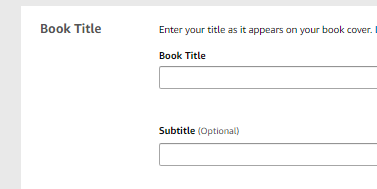
Click on the + paperback icon to create a new title. This will open up a paperback details page. Here you’ll need to fill out the title, description, and author info. You can fill out keywords too to help people find the book when searching on Amazon.
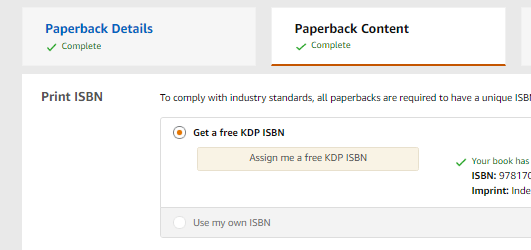
Once you fill out the paperback details section, you’ll hit the save and continue button on the bottom right. This will open paperback content section. Here the first thing you’ll do is hit okay to using the Amazon ISBN. This is the assigned number you’ll need to sell through Amazon. If you want to sell your book somewhere other than Amazon you may need to purchase your ISBN somewhere else. ISBN numbers can be expensive. So it’s nice that Amazon will provide you a free one that you can use on their site.
After this you’ll have the options to select the print size and paper type. You’ll also need to select if you want the book to be in color on black and white. All these selections will alter the final cost for the book print. After those selection you need to select the cover type of the book. Matt or glossy. There is no hardcover options for Amazon KDP.
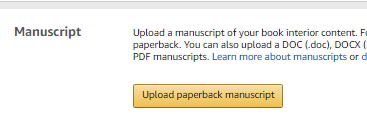
The next section is the actual content. You will hit the upload button and upload the pdf. It says you can upload other options but PDF tends to have the least errors.
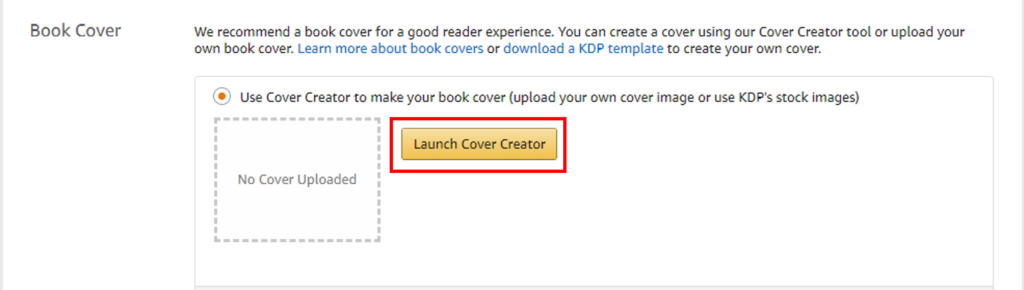
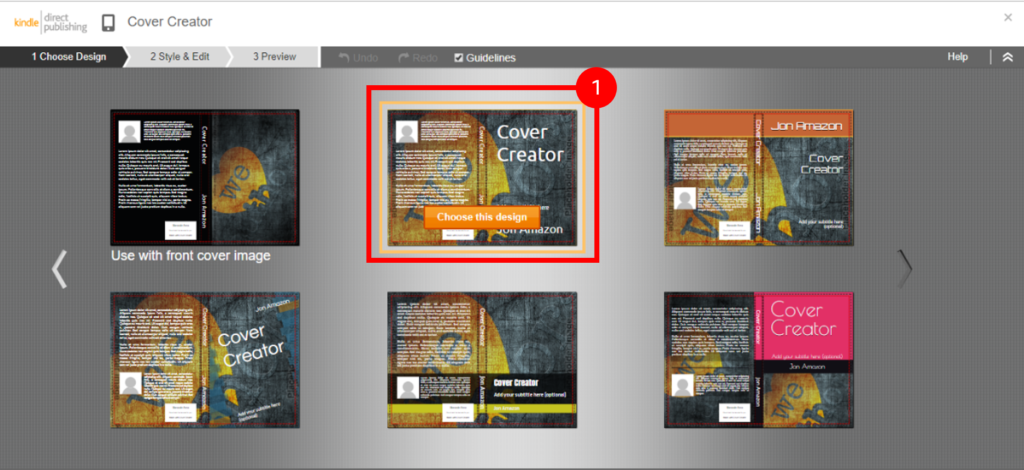
Once your upload says it went through you will have the option to work on your cover. They have a cover designer built in with some layout options.
You’ll be asked to preview your cover and approve it. After you preview the cover you’ll have a chance to preview the whole book. If there are any issues with the book you can fix it before publishing and some errors may be caught and brought to your attention about the previewer.
If there are any errors just re-upload the corrected version. After you approve your book you’ll move to the section about pricing. Then you’ll select publish. The book will then go through KDP approval before going live. If there are any issues with the book they will email about those issues.
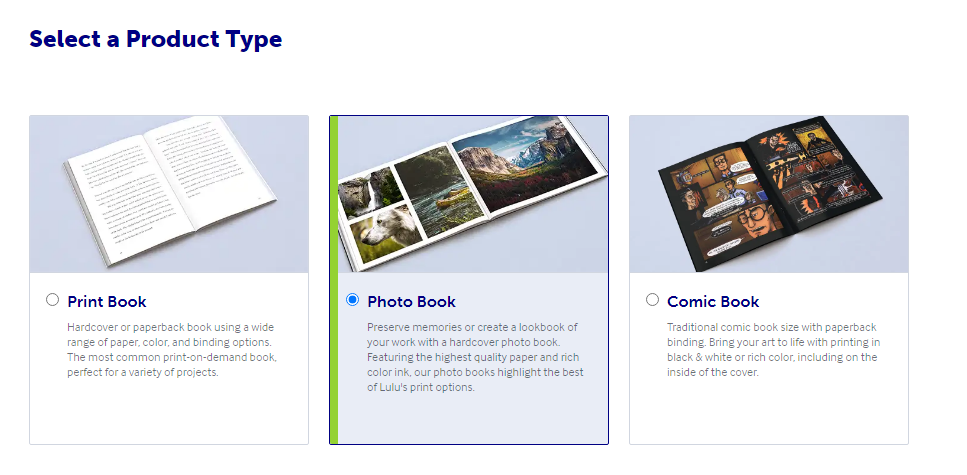
LULU
Lulu has been in the book publishing arena for a while. They have various types of products, print books, photo books, magazines and comic books. To use their services you’ll need to create an account. Then you’ll select what type of book you’d like to create.
After selecting the product type, you will need to enter the project title and language and also choose what type of distribution for the book. If it’s just for you or if it’s for sale. After that the Lulu dashboard will pop up. Here you can upload the pdf file. If you are wondering how to create a book pdf watch the previous sections tutorial on how to turn a PowerPoint into a book file. After uploading the PDF it will tell you the number of pages in the book. You’ll be able to choose if your book is in color or black and white. You can also select the paper type. Next, you can design the cover using their downloadable templates. Now is the time to review the book and publish it.
As you can see most of the process of book printing is filling in information. Once you design the book in your preferred program it’s easy to get your book created. So why not make your photos tangible? There is something great about physically holding your hard created work.
Keep Reading:


Creating a photobook is and selling it is really a very good idea. I would also like to create my own photo book and sell it. Your article has really helped me a lot in achieving this goal. Thank you for sharing all this useful information with us. I really appreciate the efforts made by you to create this article.