How to Make Premiere Pro Presets

Premiere Pro presets are a great way to speed up your video editing process by saving a frequently used custom effect for use later. Not only will this make your repetitive projects easier to work on, you can also make money selling your presets! More on that later in the blog.
For now, let’s dive into how to create a preset for you, and anyone else, to easily use. View all Premiere Pro Presets here.
Watch the video tutorial!
Step One: Build the Effect
If it wasn’t obvious already, you’ll need to actually make the effect first, in order to save it. This will ideally be a combination of effects or a specific change to an existing effect.
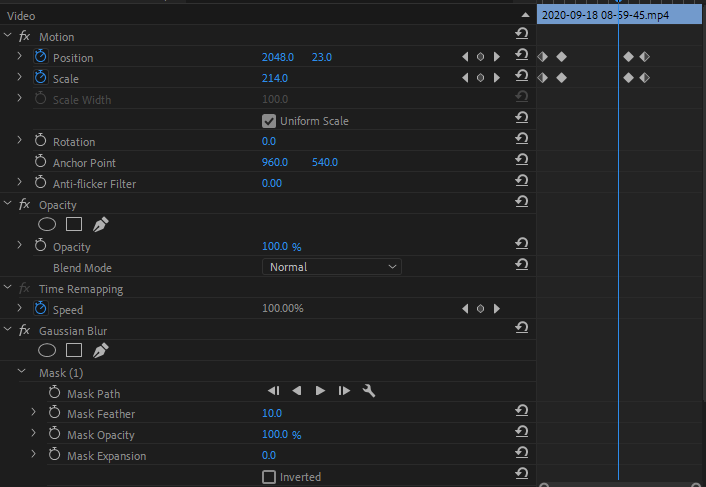
For example, you may need a sliding transition effect that ramps up in speed and has a blur that increases as the speed increases. This would take a little while to manually animate every time you needed it, so it’s worth creating a preset for.
Step Two: Saving the Preset
Now that you’ve set up your preset, you can save it. Select all of the effects you want in your Effects Control Panel by holding Ctrl (or Command) while clicking, or right-click the Effects Control Panel and click Select All, if you want to select everything. To lock in your preset, just right-click on and of the select effects in the panel and click Save Preset.

Step Three: Finalize the Preset’s Specifics
Before your preset finishes saving, you will have some settings to adjust. The name will be the first setting, so give it a name that you can use to easily identify it. Next, you’ll determine how your preset will interact with clips by choosing the type, and it allows for a lot of customization on how you want to use the effect.
- Scale: This type of preset will happen at the same relative time no matter what clip it is put on. That means whether you put it on a clip that is one second, or a clip that is one hour, the effect will be time-adjusted to happen at the same percentage through the clip. So if your preset starts 20% of the way through the clip when you create it, it will do that on every subsequent clip and increase or decrease the effect speed accordingly.
- Anchor to In Point: This type of preset will apply to the start of a clip. It will start however far into the clip your original preset did. So if your preset starts two seconds in, it will start two seconds in on every clip you apply it to.
- Anchor to Out Point: This type of preset works similarly to the previous type, except it applies to the end of a clip. So if an effect ends two seconds before the end of the clip, it will do the same on future clips you apply it to.
Lastly, give the preset a description with usage notes if it might not be clear how to use it.
Step Four: Use Your Premiere Pro Presets
To utilize the preset you made, go to your Effects tab and into the Presets folder. There you will find all of your presets and can drag it onto your clips just like any other transition or effect. Now all of your favorite custom transitions will come to life with no trouble!
How to Sell Your Premiere Pro Presets
Here on FilterGrade, we actually let editors sell their awesome presets! If you’re interested in doing this, we actually have a guide dedicated to adding Lightroom presets and After Effects Templates. But here’s the short version, and applied to Premiere Pro.
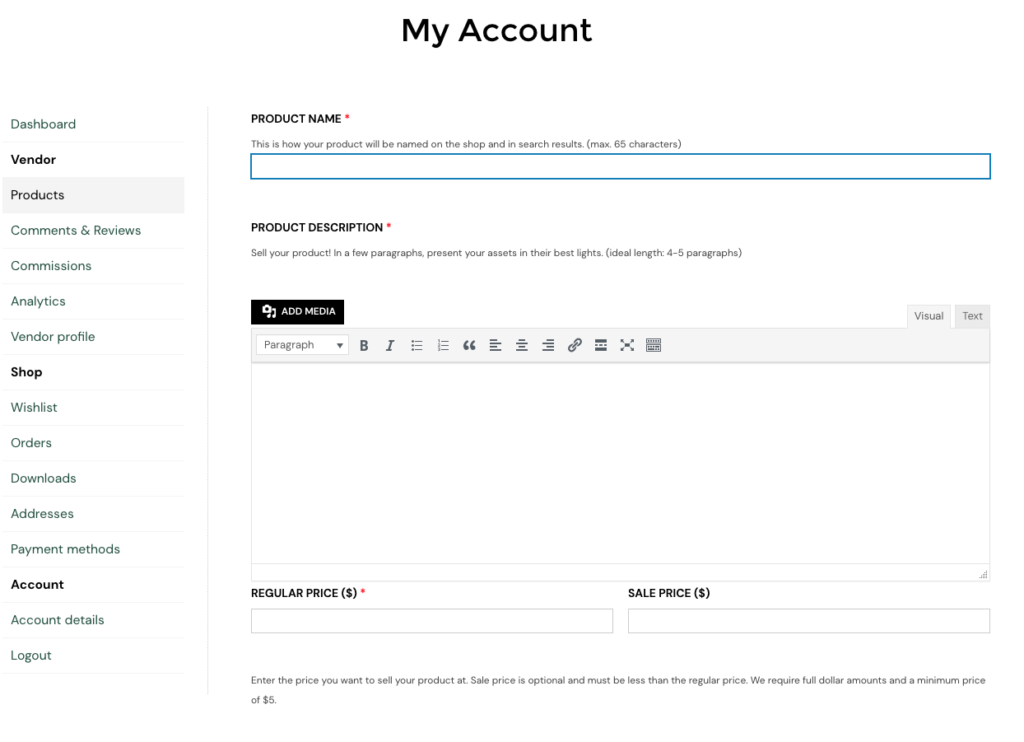
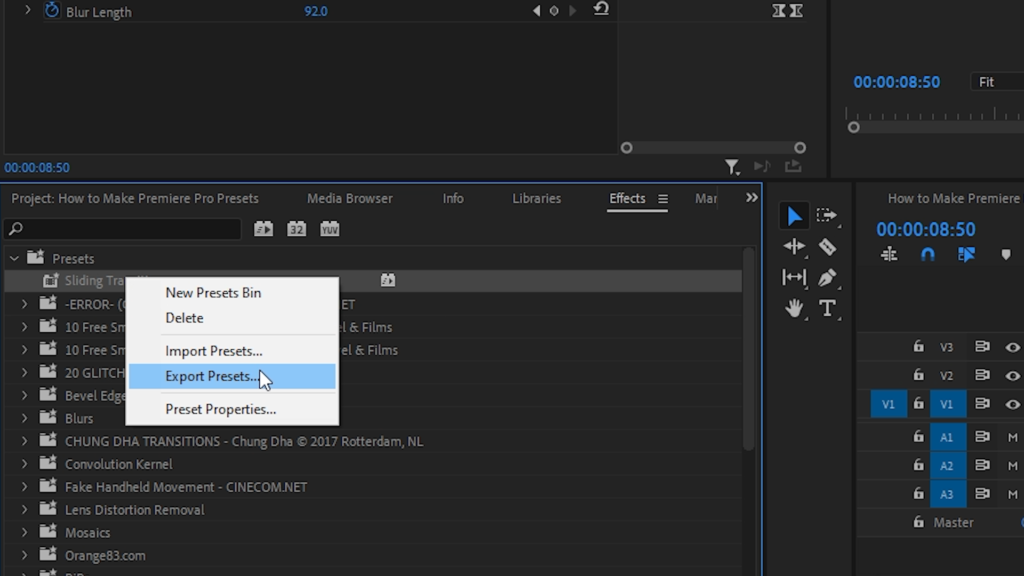
It’s actually really easy, and you can start making money quickly. Start by applying here. Once you’re approved, click on Products on your dashboard, and select to create a product. You’ll see boxes for various information to describe your Premiere Pro presets. You will also need to upload your file, of course. To share your preset, right-click on it in your effects panel, and click export presets. Then save it in a location of your choice.
Once you have your preset uploaded and your pricing set, your presets will be available for purchase on the FilterGrade marketplace! If you need more information about how to add your presets, refer to the linked articles above.


Thank you for tell us how to make presets.
Thanks for the comment Jenish!