How to Unmerge Layers in Photoshop

So you’ve merged multiple layers in Photoshop to make your life easier. But now you’ve realized you made a terrible mistake! You need to unmerge them again in order to complete the edits you need. Luckily there are a few ways to unmerge layers in Photoshop, and a few best practices to avoid the issue altogether.
1. Just Use Undo
If you have merged layers within the last few steps, and you don’t mind losing any progress you’ve made since the merge, you can simply undo the merge. You can use the undo command under the Edit tab or you can press Ctrl + Z (Windows) or Command + Z (Mac) to do so.
2. The History Panel
The History panel is a powerful tool, and you can use it to unmerge layers in Photoshop. This panel keeps track of all of the changes you make. It goes back 50 actions, so it won’t help if you merged too long in the past. But if you recently made this change, the History panel can be your savior. If you don’t have this panel visible already, then you can click on the Window tab and click on History to show it.
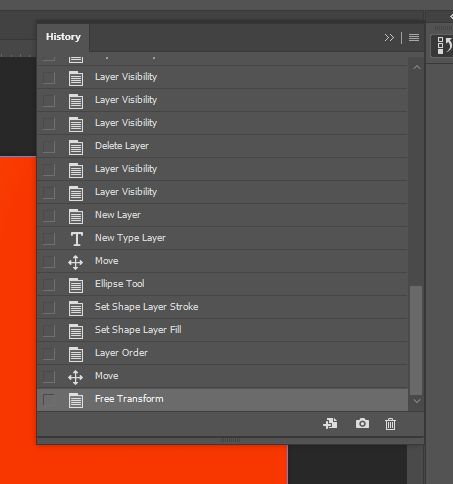
Scroll through the panel until you find when you merged the layers, then click on the state before the merge layers step, and your project will be reverted back to before the merge occurred. If you want to be safe, you can actually increase the amount of saved history states. Simply go to Edit > Preferences > Performance > History States. Just remember that your computer could struggle if you increase this number, and reduce the performance of Photoshop.
Alternatives to Merging Layers
Photoshop is a feature-rich program. And even though you can merge layers, there are better options. You should never be merging layers when there are other non-destructive ways to end up with the same results.
Smart Objects
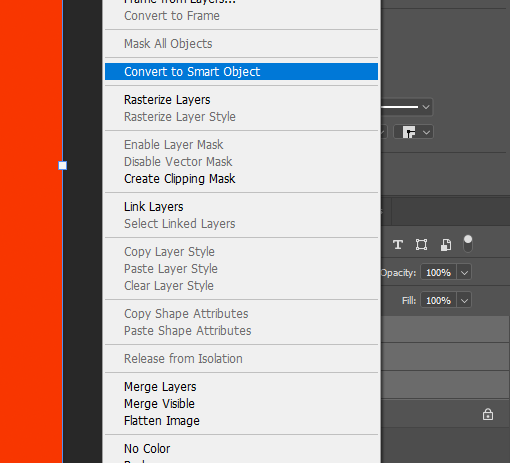
Smart objects can merge layers without actually merging them. You can still use and edit each individual layer. To turn a group of layers into a smart object, right-click them, and select Convert to Smart Object. If you want to edit this smart object in the future, right-click on it and select Edit Contents. A new tab will be created and you can edit each layer within the smart object, then save this sub-project to see the changes in your primary project panel. If you no longer want to use a smart object, you can right-click on the smart object and select Convert to Layers. Doing this will place each individual layer in a group folder for ease of access. All the benefits of a merged layer without being destructive!
Group Layers
Converting a selection of layers to a smart object is great if you need to edit those layers. But if you were merging purely to declutter your project, there is a better way. You can simply group layers. Do this by selecting all of the layers you want to group together then clicking on the folder symbol on the bottom of the layers panel. You can also right-click and select Group From Layers. You can then expand or collapse the folder contents as you need.
Merge with Backups
Merging layers isn’t the end of the world if you do it safely. Before doing so, create a backup folder by duplicating the layers you intend you merge. Then group them together, and hide the folder by clicking on the eyeball symbol. You can also duplicate and merge in one move by pressing Command/Control + Option/Alt + Shift + E. This will merge all visible layers (layers with the eyeball toggled on) into a brand new layer, while leaving the existing layers alone. This method might be hard to remember, though. Regardless of how you do it, it’s a good practice in Photoshop to create a backup of a layer before permanently changing it.
Conclusion
If you’re hours into a project, looking to figure out how to unmerge layers in Photoshop, this article may have left you high and dry. But hopefully you can use one of the tips presented here to avoid merging layers in a destructive fashion in the future. It’s just one of many reminders to avoid destructive edits as much as possible in Photoshop!


