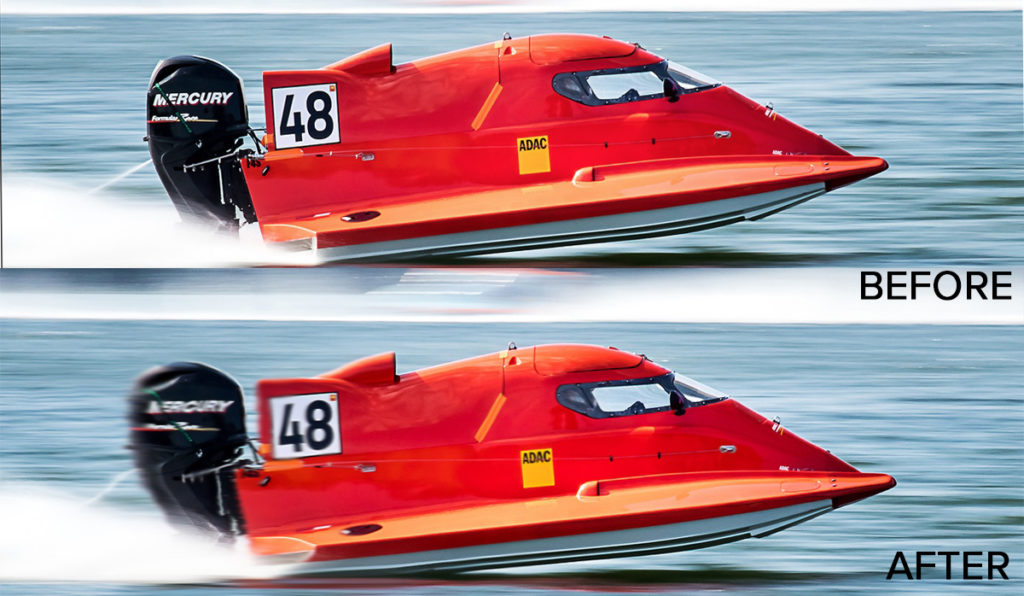
How to Add Motion Blur in Photoshop
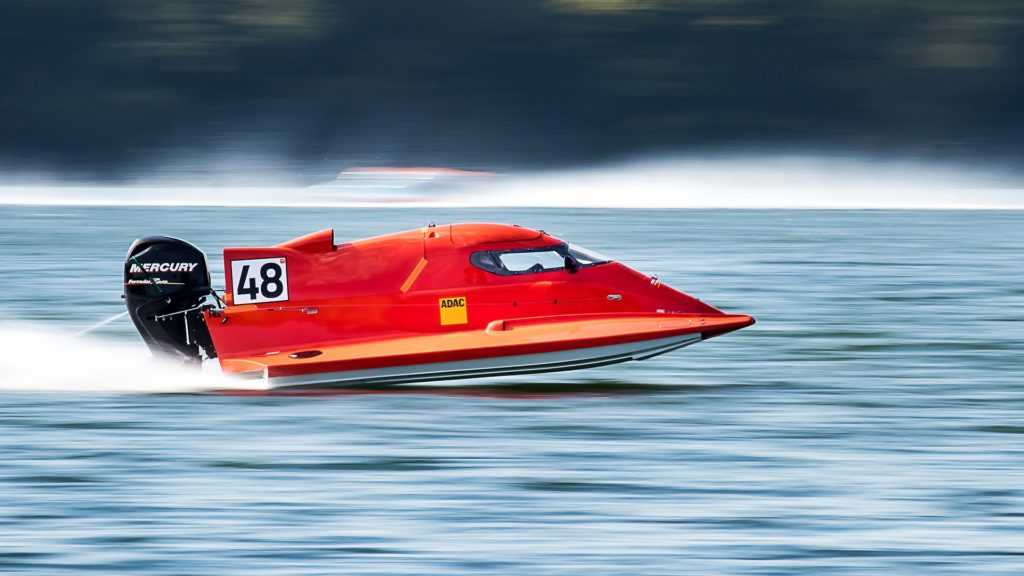
The motion blur effect… It’s extremely desirable and notoriously difficult to achieve, organically that is. While the elusive slip of motion is oftentimes hard to capture on camera, it is relatively simple to add in Photoshop. So if you missed getting the speed tail on film, follow these simple steps to learn how to add a motion blur, in Photoshop.
Step 1: Copy the Background
As with any alterations in Photoshop, the first step you want to take is to copy your background. We don’t want the blur applied to our entire subject, so this will help control where it is and preserve the original image.
Make a selection of the subject using whichever tool you prefer. If the outlines are clear, the quick selection tool is best.
Once you have a selection of the subject, copy it to a new layer. Hit Cmd + J (Ctrl + J for Windows).
Step 2: Remove the Subject From the Background
This is a very important step because we can’t, and shouldn’t, just apply blur to the background layer. Doing this helps to achieve a more realistic final product, so don’t leave this step out!
The fastest way to remove a subject is with a clone stamp tool.
Make sure to make the layer with the copied subject invisible.
Select the Clone Stamp tool. Then, pick a soft brush and Alt + click in an area around the subject to sample pixels.
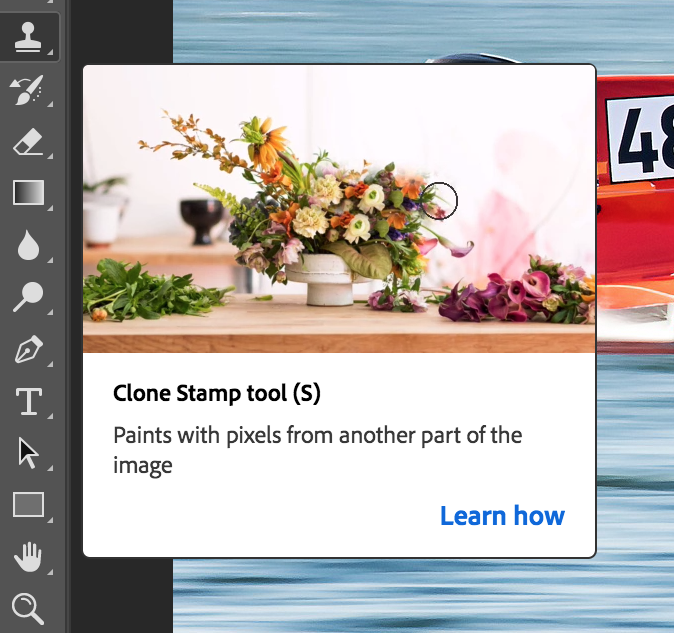
Now, use the clone stamp tool to remove your subject. Pro tip: It’s best to resample new areas as you move around the subject.
And, by no means does this have to be perfect. We’ll be blurring it later so you won’t see any imperfections.
And, you can go ahead and make the layer visible again.
Step 3: Blur the Foreground
When adding the blur to the foreground, we recommend using smart filters. If you don’t you’ll have to reapply the filter every time you change something.
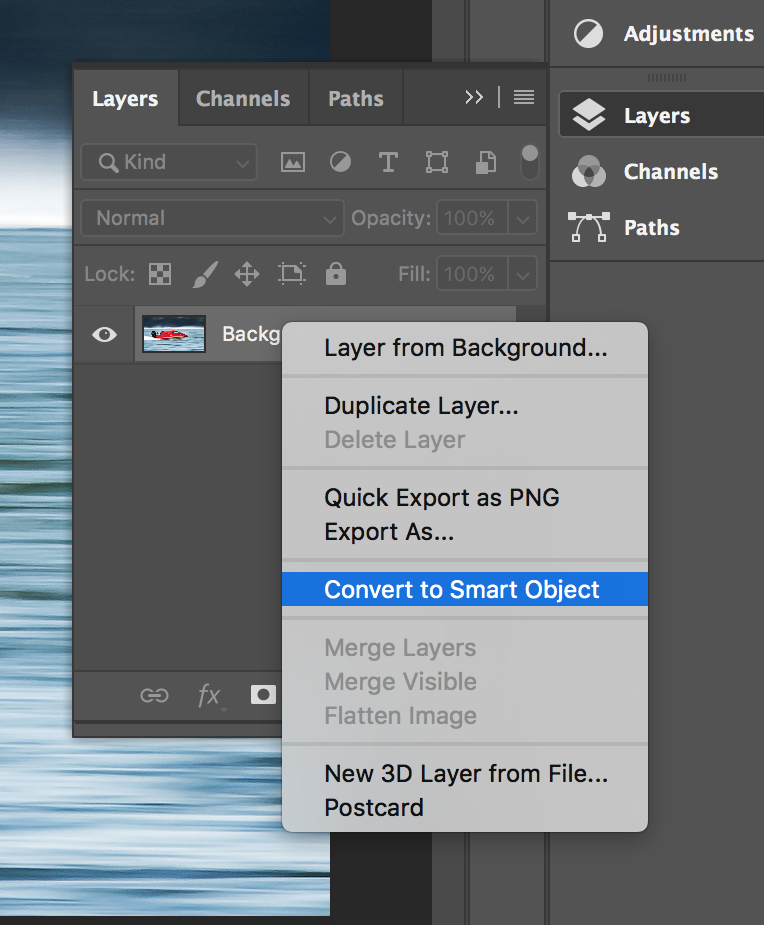
Prepare the layer by right-clicking on the layer from which you’ve removed the subject and select “Convert to Smart Object”. Now, whenever you apply a filter to this layer, Photoshop will automatically use smart filters.
Instead of using motion blur, which may seem like the obvious choice, we’ll be using the radial blur so that we can control the direction.
Go to Filter > Blur and choose “Radial Blur”.
Select “Zoom” and set the amount of blur. Then, click on the white window to set the center point of the blur. You can play around with this a bit until you find something that you feel looks good.
Now it’s time to remove the background blur from this layer.
Select the layer with the Smart Filter and click on the “Add vector mask” icon.
Select the Paint Brush and set the color to black.
Pick a large and soft brush from the dropdown menu.
Start painting over the background. Double-check to make sure that the mask thumbnail is selected. Black areas in the thumbnail indicate where you have already painted.
Step 5: Add Blur to the Background
Now we can add a blur to the background layer. Right-click the layer with blur and select “Duplicate”.
Select the Paint Brush tool, and then set the color to white.
Fill the Layer Mask with white again by painting over the photo, and keep going until the entire thumbnail is white and the blur is visible again.
Double-click on the Radial Blur Smart Filter and change the direction of the blur.
Pro tip: Use less blur in the background. In a natural setting, the objects further away from the camera would have less blur.
And then, using the same steps as the previous step, remove the blur from the foreground. Select the mask thumbnail and paint with black over the foreground.
At this point, both layers, with the background and foreground blur, should be partly visible.
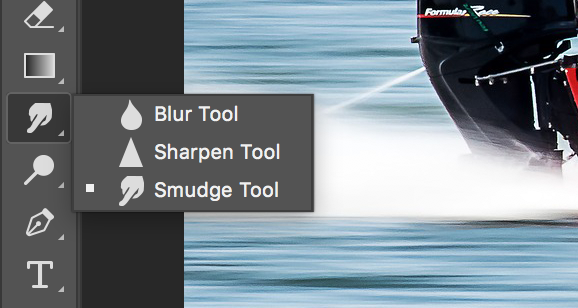
Step 5: Make Your Blur More Realistic With the Smudge Tool
Finally, to make this look as natural as possible, you’ll want to add some blur to the subject as well, with the smudge tool.
Create a new layer on top of all the previous layers. Make sure the top layer is selected and click on the “Add new layer” icon.
Select the Smudge tool.
Make sure to check “Sample all layers,” and set the strength to somewhere between 2 – 5% depending on your photo and preferences.
Use the Smudge tool to blur some of the edges of your subject.
And, if you have any areas where the two blur filters from the background and foreground don’t match up, just use this tool to blend them together.
Pro tip: Don’t forget to lightly blur any shadows cast by your subject.
And that’s it! You’ve added a motion blur effect to your photo with nothing but Photoshop and a little elbow grease.
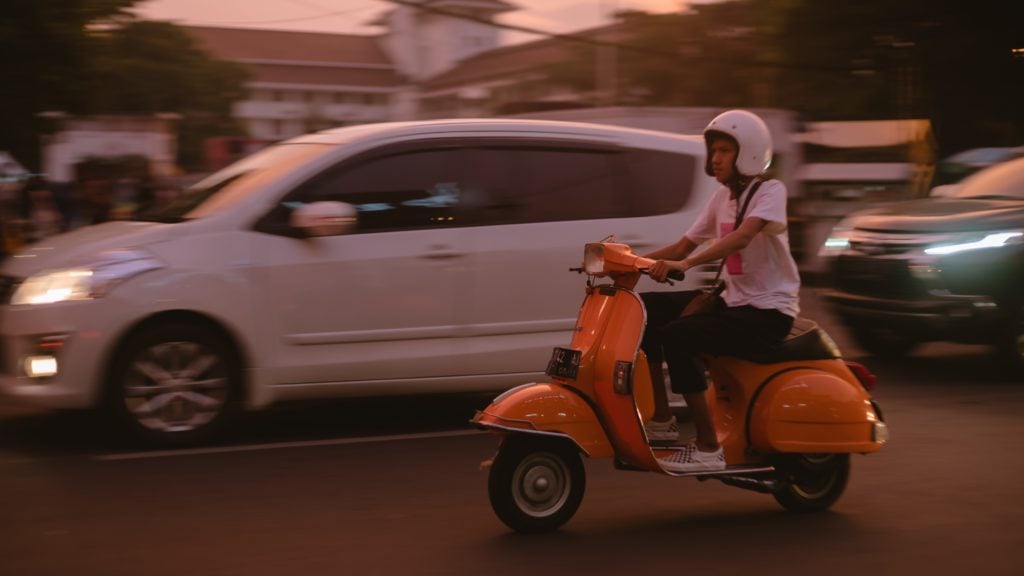
Put Things in Motion
There are many, many different ways to add and apply a motion blur to a photo. With different extremes, speeds of motion, colors, and subjects, each motion blur will turn out a little bit different. So now that you know how to add motion blur with Photoshop, experiment with the process. Try just blurring the background or adding a motion blur to something that’s not already in motion.
Photoshop is a great way to add an effect that you couldn’t quite capture on camera, so the possibilities are endless. You can even try different variants to find your own personal style and take note of motion blur effects you want to emulate.
This effect may look difficult to replicate, but follow these steps and you’ll be a pro in no time.


I didn’t understand this even after watching many videos on YouTube. But after visiting this blog, everything seemed very easy to me. Thank you. Be well.
Nice your motion blur photoshop……
Great Blog. It’s very helpful for me
Thanks so much for supporting our blog!!