Removing Objects from Your Photos in Photoshop

Taking photos over the years, I’ve had to remove objects from my photos for a number of reasons. Sometimes it is removing logos and brandmarks in a commercial shoot. Other times, it can be for removing branches or wires from the edge of an image.
Regardless of the case I usually use Photoshop to remove objects and unwanted details in an image. In this article, I’m going to share the tools I use so you can learn how to remove any unwanted objects from your photos.
I’m using Adobe Photoshop CC 2017 right now, but most of these tools (or variations of them) have been available since Photoshop CS3 or CS4. If you are using one of those programs and run into issues or confusion, leave a comment below and we’ll do our best to help.
Photoshop Tools for Removing Objects
These are the tools I use the most when removing objects from my photos:
- Content Aware Fill
- Spot Healing Brush Tool
- Clone-Stamp Tool
Each tool works best in different situations and some of them work best combined. Below I’ll share the techniques I use with each tool and how I apply that into my overall workflow when editing a photo in Photoshop.
For all of these examples I am working with a locked background layer (the photo) and duplicating the layer first to ensure all my changes/adjustments aren’t on the locked background. This way if you mess up beyond the point of return or can’t undo further, you can just delete the layer, reduplicate your background, and start fresh.
Another thing to keep in mind as you’ll be using these shortcuts a lot.
- Undo = Command + Z (Windows Undo = Control + Z)
- Step Backward = Option + Command + Z (Windows Step Backward = Ctrl + Alt + Z)
The biggest difference between the two is that Undo is for quickly jumping back and forth between a change. Step Backward allows you to continue clicking ‘Z’ to take steps back. Meaning if you added 2 adjustments layers and edited a few of the settings, you can undo all of those steps by clicking Step Backward X times.
Content Aware Fill
The Content Aware Fill technique works best for removing large objects and difficult sections from an image. The Content Aware tool identifies similar textures/details near the area you selected and replaces your removed object with those details so it blends and looks natural.

Here is how I would use content aware to remove the logos from the buildings in the image above.
First zoom in on the section you want to edit. Then use the Lasso Tool to select the section of your image where you have an unwanted object.
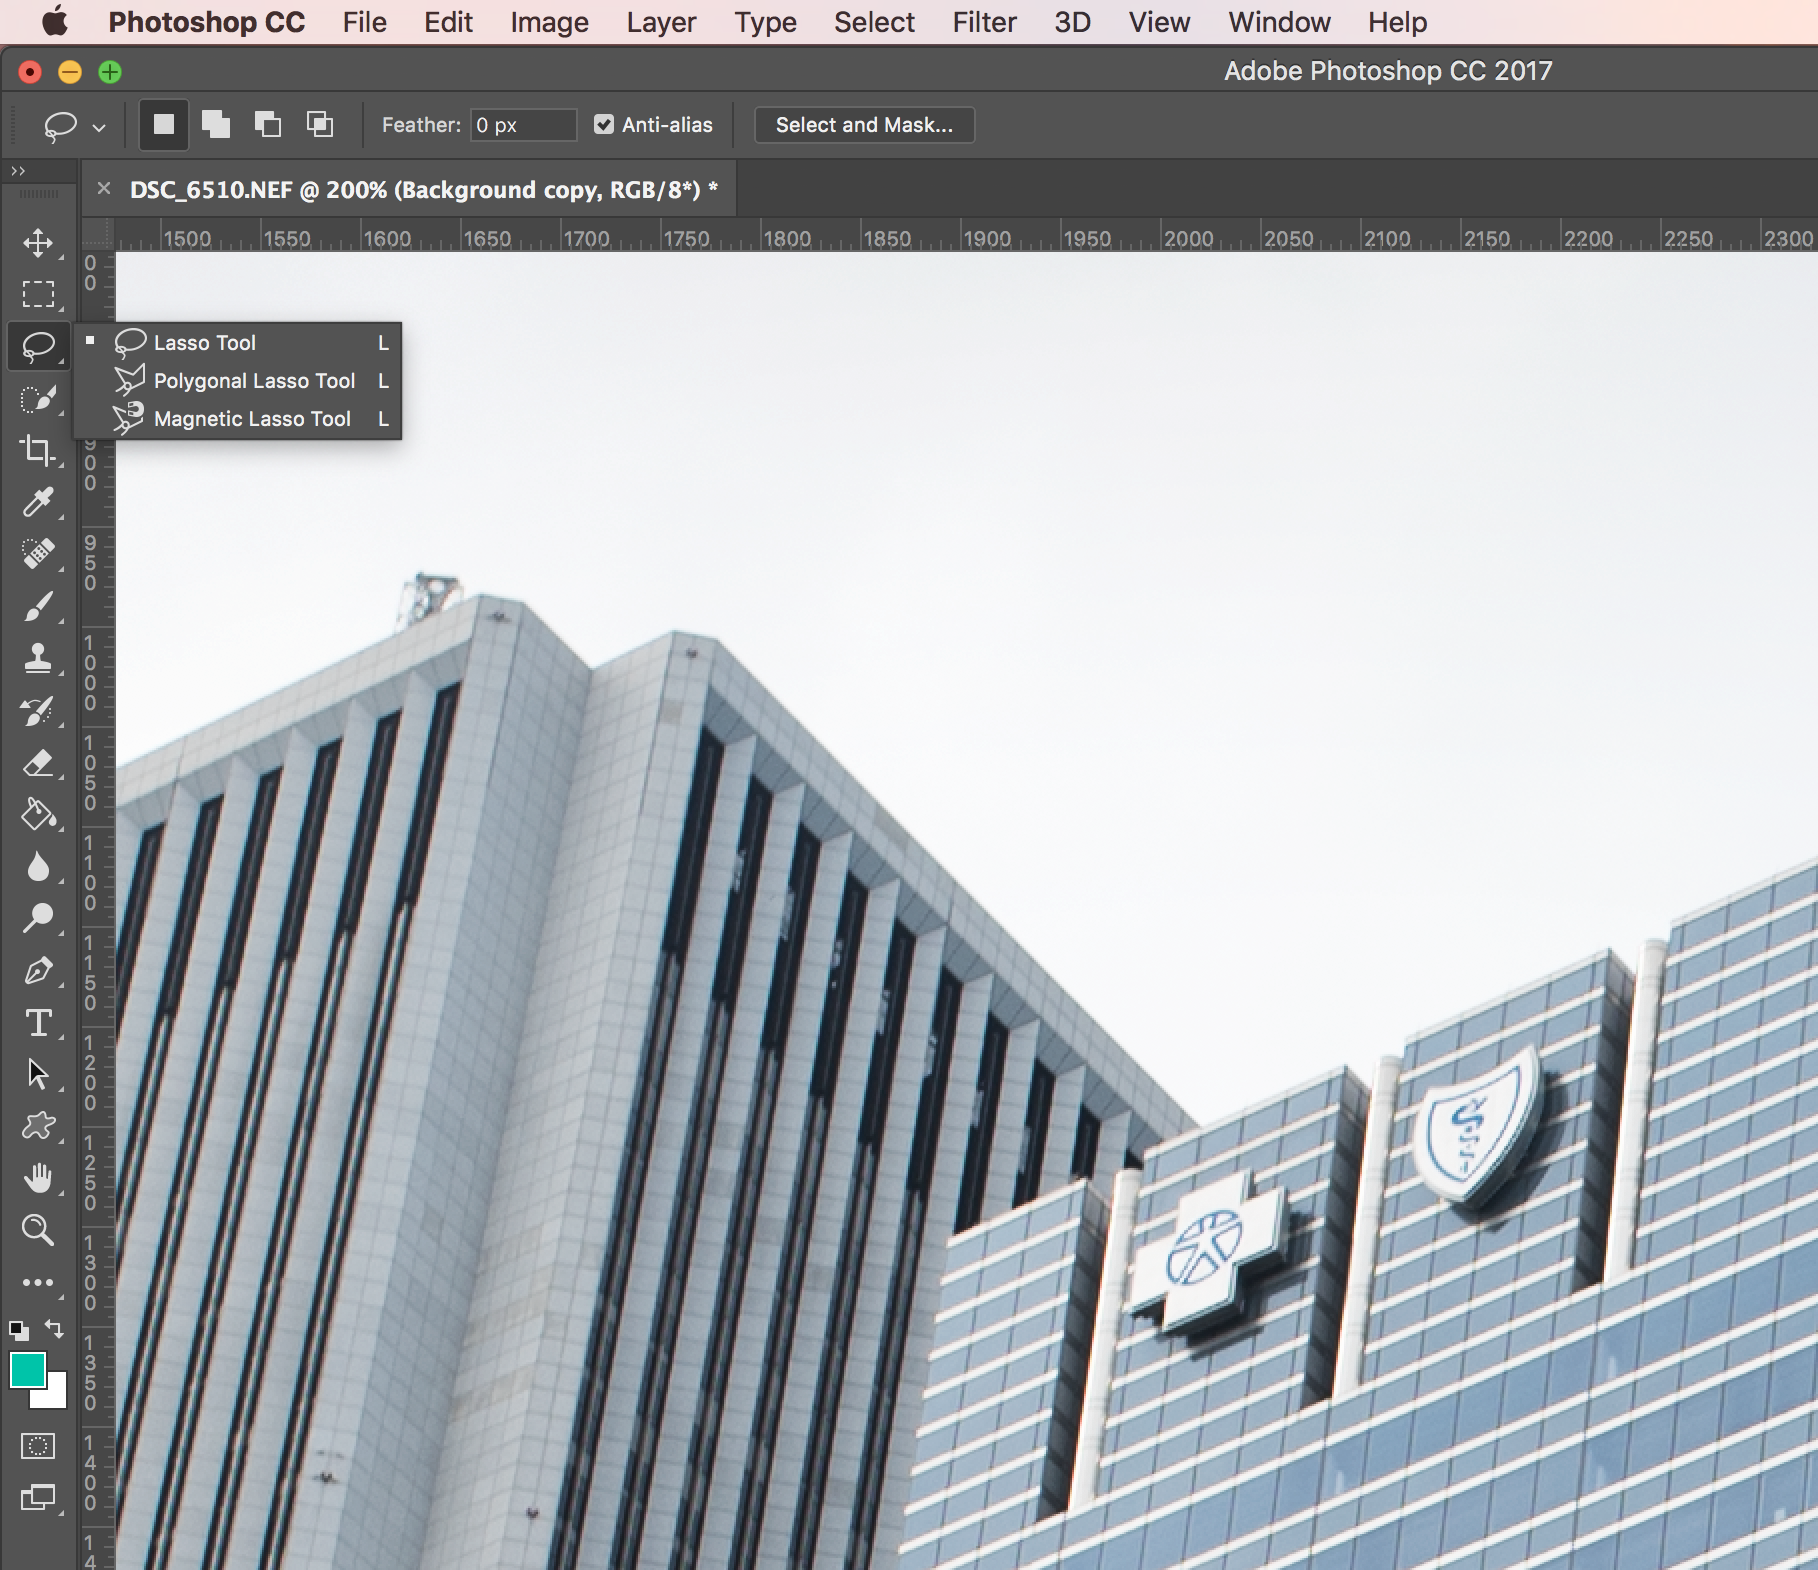
Try to get as close as possible to the object, and if there are multiple objects, repeat the process for each one separately. You may also want to make the adjustments on separate layers as well.
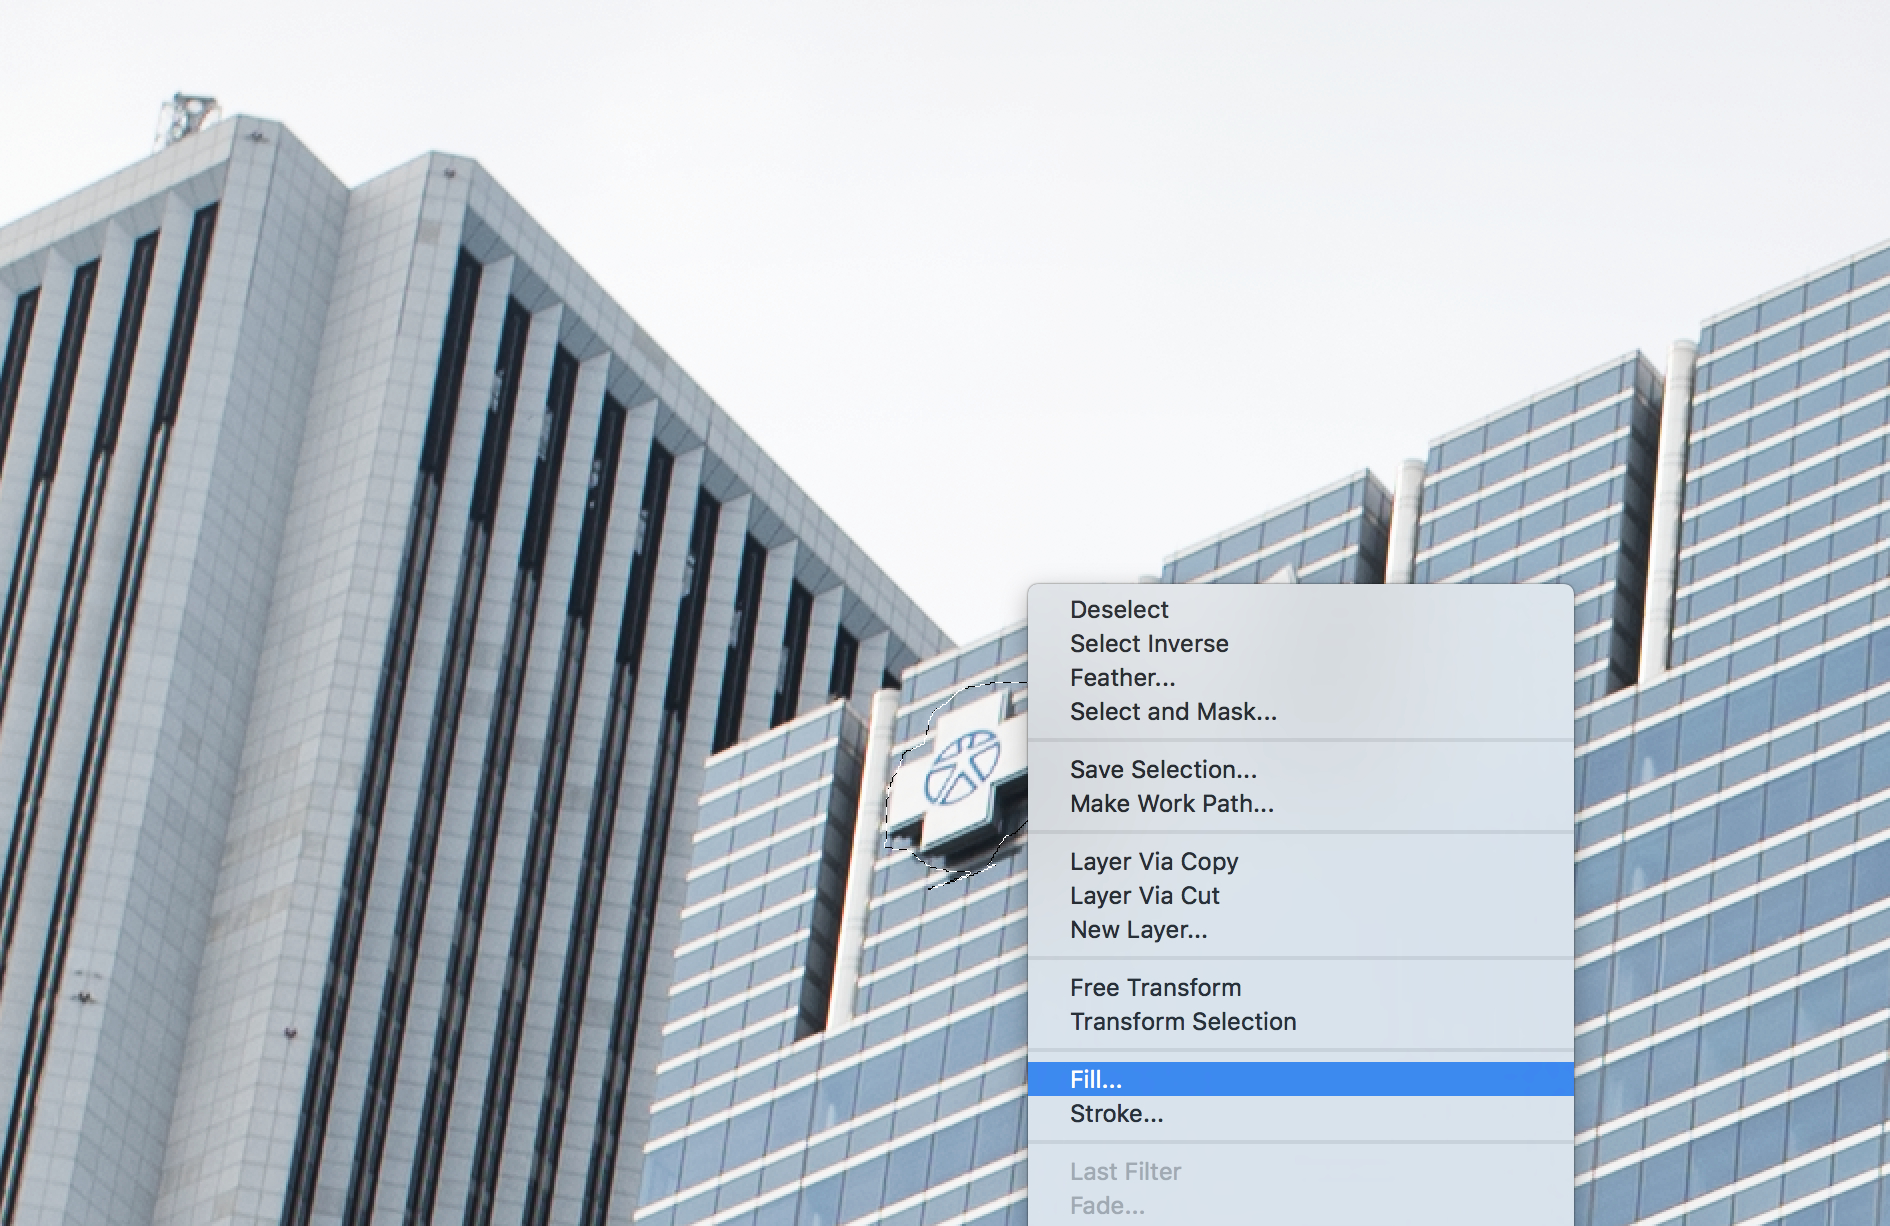
Once you’ve selected your object, right click the selection and click ‘Fill’.
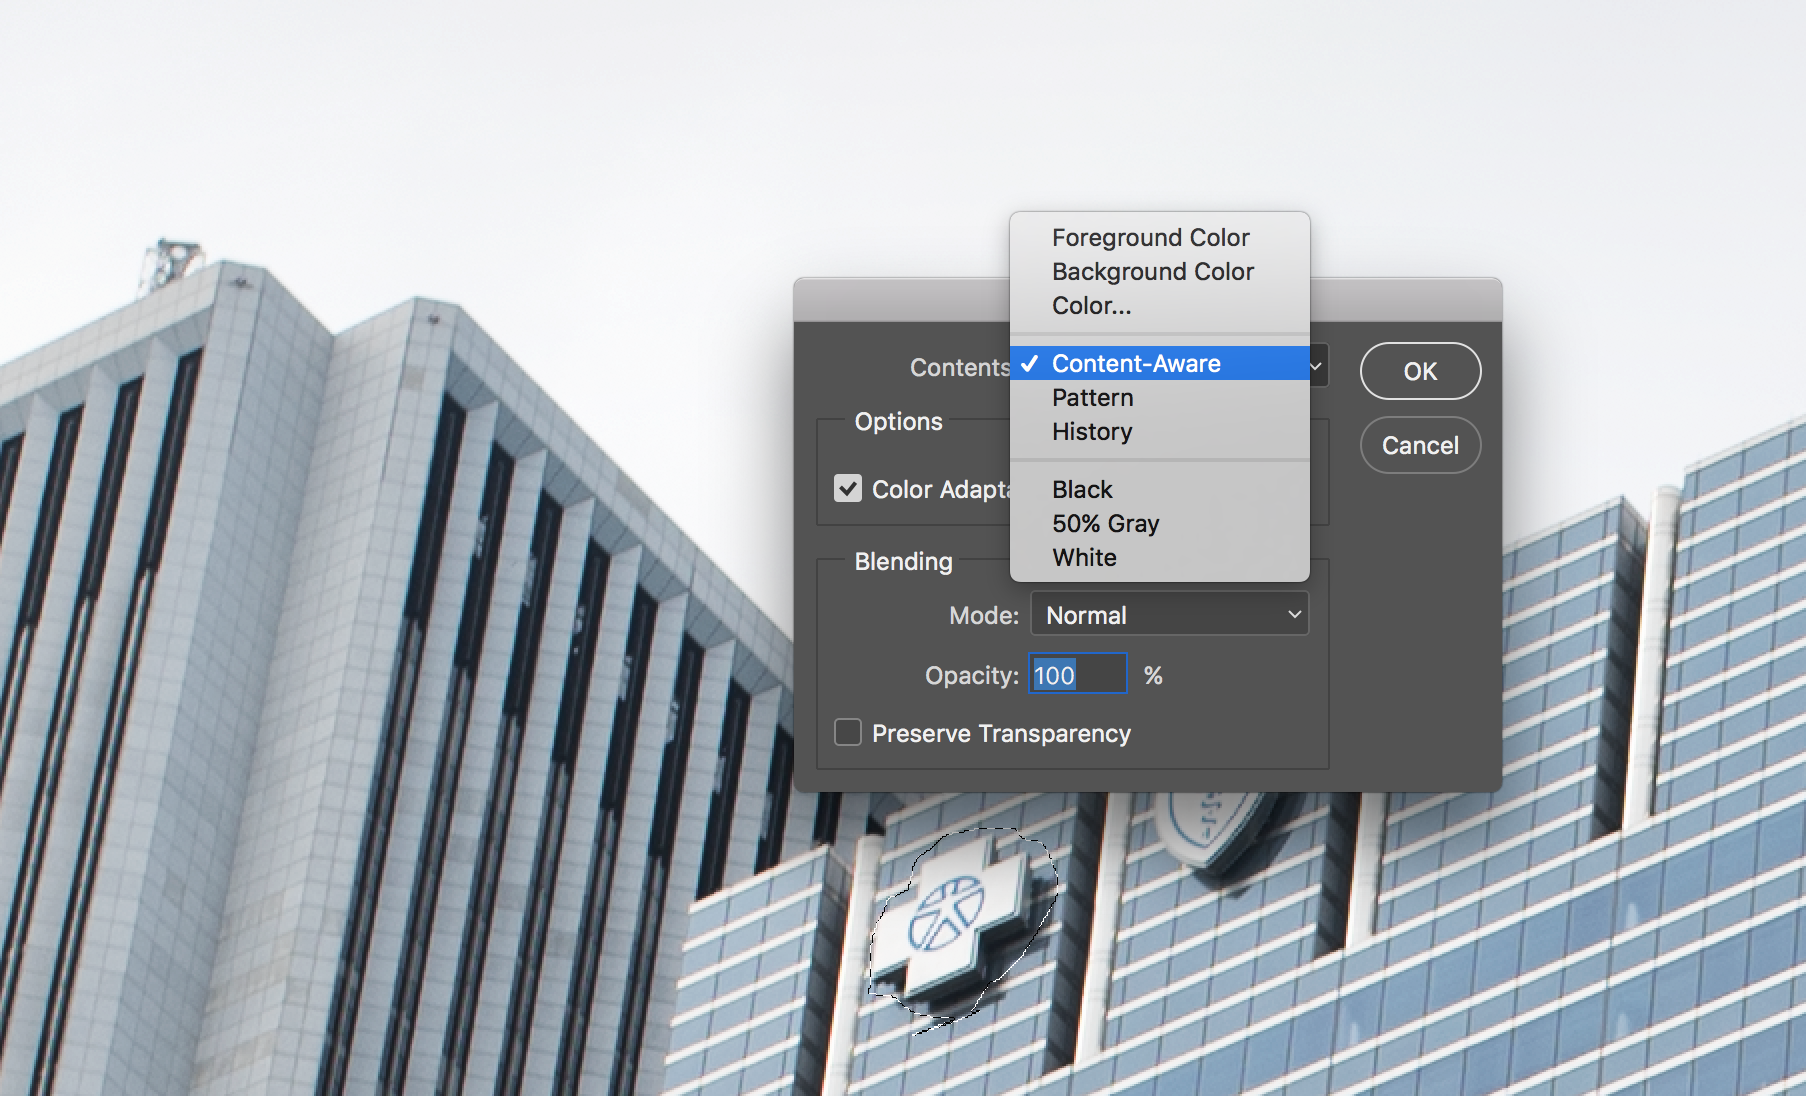
Make sure it is set to ‘Content Aware’ and then click OK. After clicking OK, this is what my image looked like.

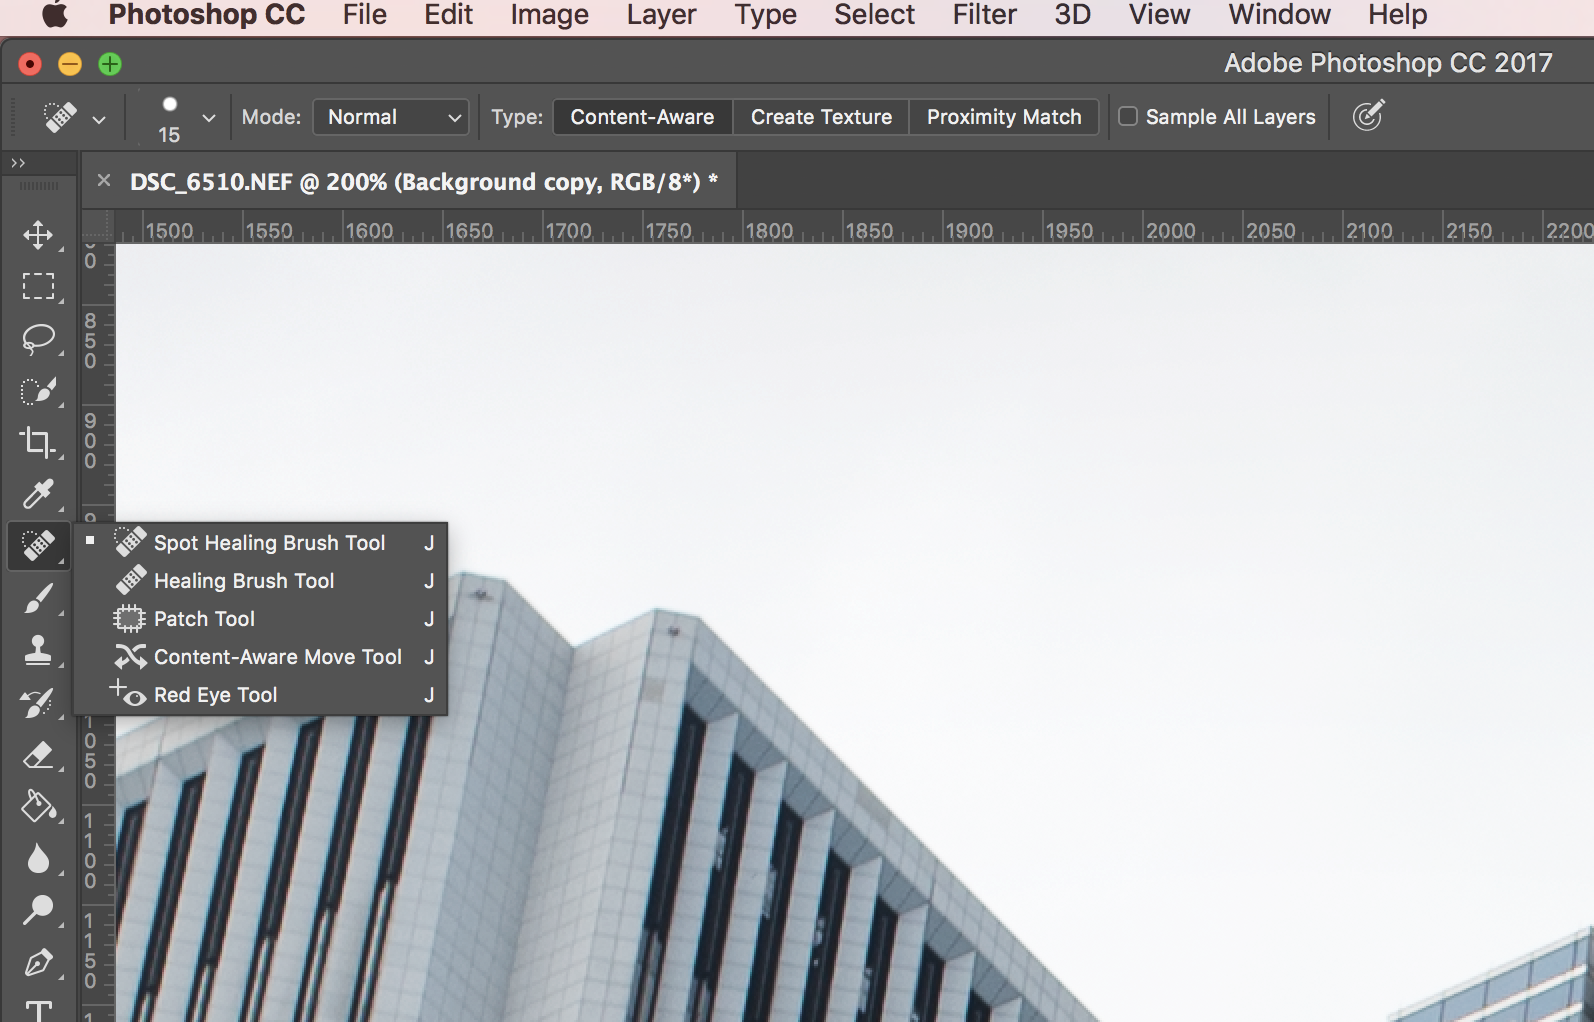
As you can see, the results aren’t perfect. This is where the Spot Healing Brush Tool comes in.
Spot Healing Brush Tool
I usually use the Spot Healing Brush Tool in combination with Content Aware Fill to clean up extra messes. When you have a jagged selection or hard line after using content aware, you can using the healing brush to smooth the spots.
After selecting the healing brush, click and hold over sections to gently erase the morphed sections. In the gif below, you can see at first after selecting the tool a black and white locked circle appears. This means you can’t use the tool, and it happens when a layer is not selected or if you select a layer that is not editable (locked layers, some adjustment layers, etc.). If you select the image layer you are trying to adjust, the tool will then work.
After repeating the steps for the other logo, the final image looks like this.

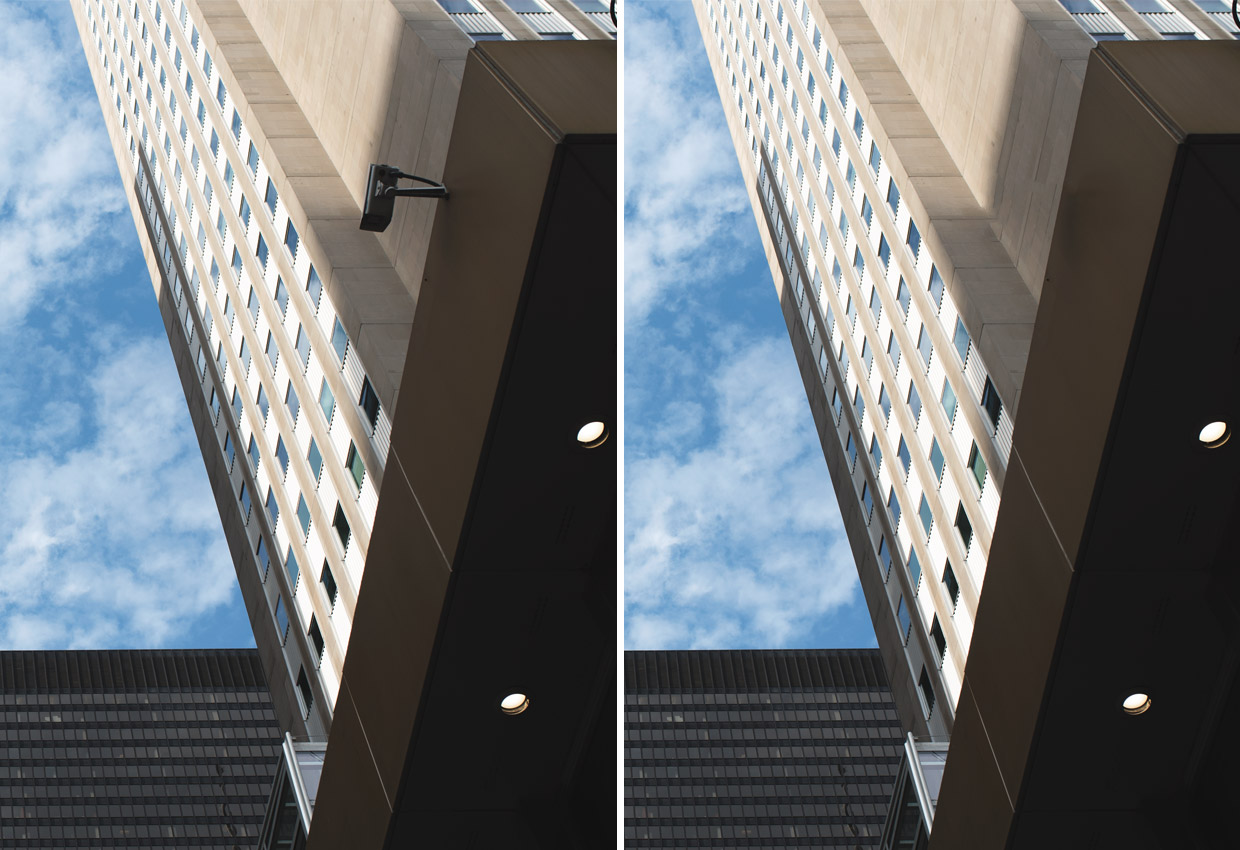
You can also use the Spot Heal Brush Tool for other purposes. In the image below, I’ve used it to remove a security camera from a real estate photo. You can also brush skin to remove blemishes and acne, erase text from signs/flat backgrounds, and much more.
Clone Stamp Tool
The Clone Stamp Tool is another fantastic resource for removing, smoothing, and patching over areas where you want to remove an object in Photoshop. You can adjust the size to account for a larger or smaller area of your photo.
To use it, find an area near where you’ll be removing objects from your image. Then hold Option (Alt) and select, let go and then paint over the area you are attempting to cover/remove. Watch the gif below to see how.
Adobe shares more on their site about how to retouch and repair photos with the clone stamp tool, and other tools in Photoshop.
Hope this guide helped. Again, if you have any questions, feel free to leave a comment below. We’ll do our best to help.
More Resources for Photoshop
- Natural Pastel Photo Effect Photoshop Tutorial →
- Browse 1000s of beautiful Photoshop Actions →
- Watch Photoshop Tutorials on Youtube →


would like to be able to print a clean copy of the instructions as I have problems with short term memory
These are great guidelines for using these tools, and this piece of advice is a real gem:
“…I am working with a locked background layer (the photo) and duplicating the layer first to ensure all my changes/adjustments aren’t on the locked background. This way if you mess up beyond the point of return or can’t undo further, you can just delete the layer, reduplicate your background, and start fresh.”
Thanks for sharing.
Regards,
Tim – Learning Curve
Thanks Tim, glad this was useful to you!