How to Create a Simple Cartoon Effect in Photoshop
Have you ever wanted to create a colorful and interesting cartoon effect in Photoshop? Learn how in our latest tutorial on Youtube! This is a simple video walkthrough with easy to follow steps so you can learn some cool techniques for creating a cartoon effect.
If you have any questions, leave a comment on the video or down below and we’ll do our best to help.
Watch the full tutorial
Video Transcript:
Hey everyone, this is Mason from FilterGrade.
Today I’m going to show you how to create a cartoon effect in Photoshop. This works great with portraits, and is a fun effect overall.
Step 1
First, bring your image into Photoshop. Then duplicate the layer and name it Primary.
Step 2
With that layer selected, go to Filter > Blur > Smart Blur, and adjust the sliders to about 20 for radius and 30 for threshold. You may want to adjust these values to get a good smoothness. This effect smooths out skin textures, which may be needed.

Step 3
Next click Filter > Filter Gallery, and go to the Artistic folder. Select Poster Edges, then enter 10 for the edge thickness, 10 for the edge intensity, and 2 for the polarization. Adjust the edge intensity to your liking, however. In my case, I turned this down significantly because it was picking up a lot of thick lines otherwise. Click OK.
Step 4
Next, click Image > Adjustments > Threshold. Setting the threshold amount to about 50 should do the trick. This will create a black and white outline effect.
Step 5
Then go to Filter > Stylize > Oil Paint. Put in 5 for stylization, 2 for cleanliness, and leave everything else at its default setting. Then click OK.
Step 6
Now make another duplicate of the original layer, and name it Color. Hide your Primary layer and select the Color layer. Go to Filter > Filter Galley and open up the Artistic folder. Select Poster Edges again, but we’re going to enter different values this time. 0 edge thickness, 0 edge intensity, and 2 for posterization. Then click OK.
Step 7
Then click Image > Adjustments > Levels, then adjust the shadows output slider a little bit to the right to reduce contrast. Then click OK.
Step 8

Now go to Image > Adjustments > Hue/Saturation. Enter 40 for Saturation and leave everything else as default. Then click OK.
Step 9
Now we’re going to soften the colors. Go to Filter > Stylize > Oil Painting. Set the stylization to 5 and the cleanliness to 7. Leave everything else at default, then click OK.
Step 10
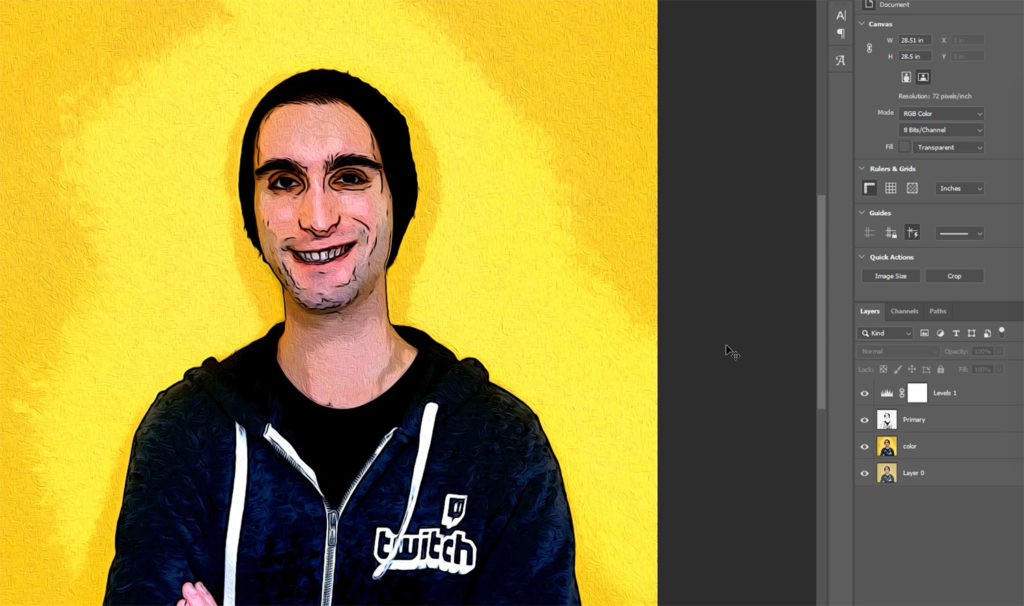
Now make the Primary layer visible again, and change its blend mode to Multiply. Then add a Levels adjustment layer, and move the shadow and highlights sliders both in a little bit to help bring out the colors.
Now you should have a good-looking cartoon portrait! Some elements of photos may not translate well to a cartoon look, so adjust your settings, or edit out parts of your original photo, to end up with the results you want.
Read next: How to Create a Photoshop Matte Effect
More inspiration!
-
Adobe’s Free Photoshop Camera App to Launch in 2020
-
18 Comic Text Effects in Photoshop
-
9 Simple Steps to Professional Image Editing in Adobe Photoshop
-
Trace: Free Photo Background Remover


